





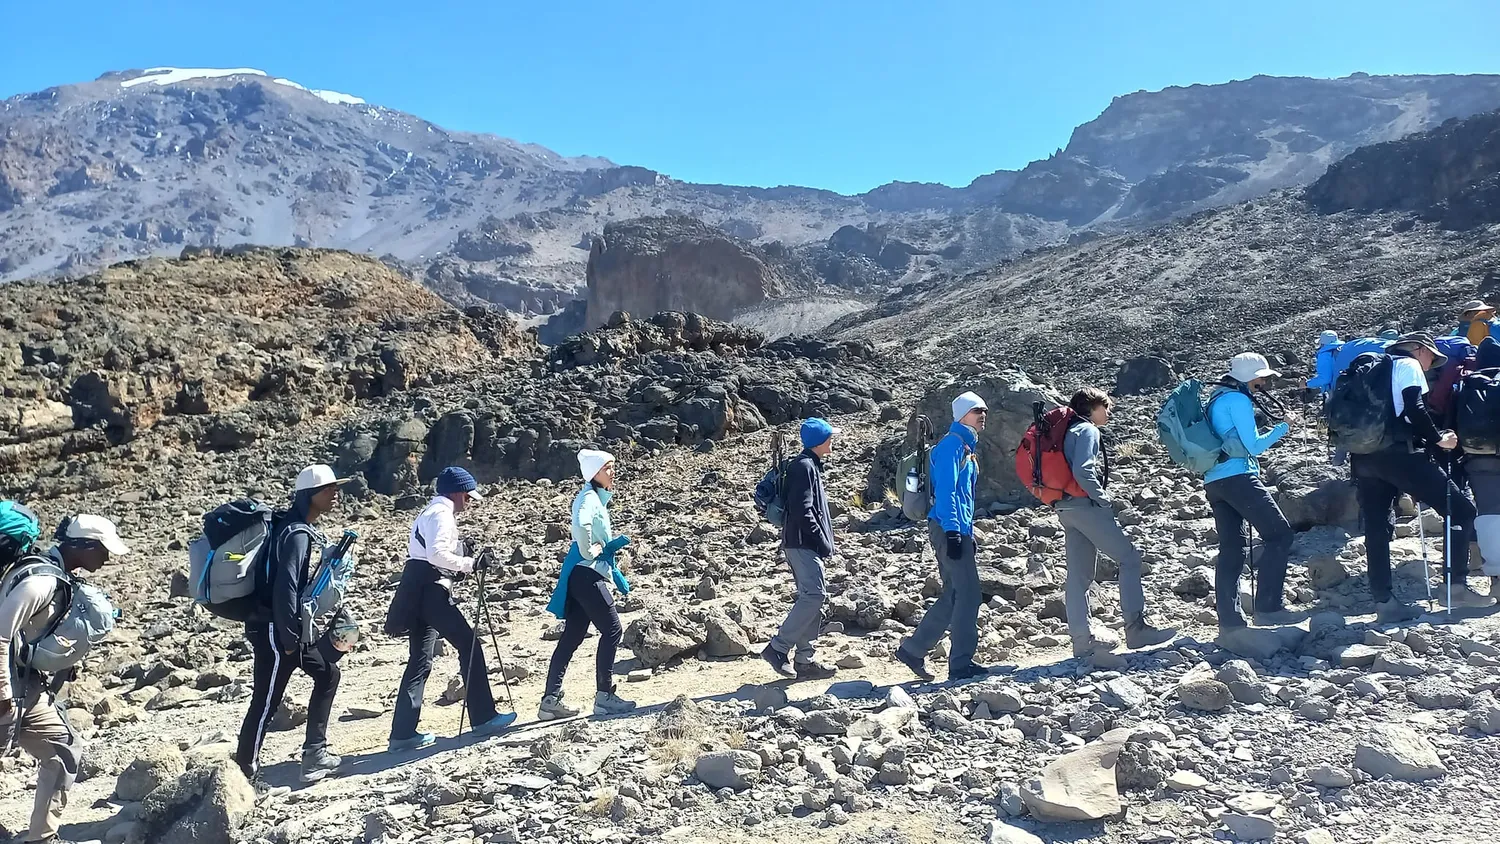
Standing at a magnificent 5,895 meters (19,341 feet) above sea level, Mount Kilimanjaro is the highest free-standing mountain on earth and a premier destination for adventurous global travelers. Because reaching the peak requires no specialized ropes, technical ice axes, or complex rock-climbing experience, thousands of trek enthusiasts attempt it annually. However, do not underestimate this massive volcano; mastering exactly how to climb Kilimanjaro as a beginner is the structural dividing line between safely celebrating at Uhuru Peak or facing an agonizing, premature evacuation due to altitude sickness.
This exhaustive field manual completely eliminates abstract speculation. We outline the absolute best high-adaptation route structures, unyielding physiological pacing rules, a dedicated 12-week body conditioning blueprint, cost management, and gear layering protocols designed specifically to shepherd non-mountaineers to the Roof of Africa safely.
Confused about all the dynamic operational costs, crew tipping formulas, and hidden expenses? Read our step-by-step financial breakdown.
Read More: Kilimanjaro Budgeting Guide1. Route Optimization & Selecting Your Outfitter
Choosing the Right Route
The choice of route determines the vast majority of whether you will reach the summit or have to turn back. As a beginner, your main goal is not just to climb, but to give your body enough time to adjust to changes in altitude and the decrease in oxygen (acclimatization).
- 7 or 8-Day Routes (Lemosho and Machame): These are designed on the "Climb high, sleep low" principle (climbing high during the day and descending to sleep a bit lower). This significantly helps the body produce oxygen-carrying red blood cells quickly without going into shock.
- Short Routes (5 or 6 days like Marangu): These have a very rapid ascent profile. The human body cannot adapt to these changes so quickly, causing many beginners to develop altitude sickness and fail to continue, even if they are physically strong.
Choosing a Reputable Tour Operator
The Kilimanjaro tourism market has a vast number of companies. There are cheap budget operators and mid-range to luxury ones. Sourcing an ethical, safety-conscious team is your most critical defensive asset when planning an expedition.
- The Danger of Budget Operators: To cut costs, they often exploit porters by not paying fair wages or providing enough food, they do not carry emergency equipment like bottled oxygen, and your food may lack proper nutritional value.
- A Reputable Company: They put your safety first. They will test your blood oxygen levels every evening with an oximeter, provide clean and nutritious food, and staff your climb with licensed guides who have years of experience saving lives on the mountain.
To fully secure your investment and physical safety, beginners are highly encouraged to organize their mountain expedition through a premium, fully accredited local specialist like Jaynevy Tours. Partnering with their expert wilderness team completely streamlines your logistical footprint, removing the stress of trip planning so you can focus entirely on mental and physical preparation.
Ready to plan an optimized, high-success beginner package backed by certified mountain safety machinery?
Visit Jaynevy Tours Official SiteWhy Choose Jaynevy Tours for Your Kilimanjaro Climb?
When mastering how to climb Kilimanjaro as a beginner, your choice of tour operator is the single most critical factor determining your comfort and ultimate summit success. Here is why partnering with Jaynevy Tours ensures a flawless and secure high-altitude trekking experience:
- Advanced Medical & Safety Machinery: They equip every expedition with comprehensive wilderness safety protocols. The guiding team conducts strict twice-daily pulse oximetry diagnostics to monitor your blood oxygen saturation and carries emergency medical oxygen canisters on every single climb.
- Expert Licensed Wilderness Guides: Their elite mountain teams consist of licensed guides certified in Wilderness First Aid. They deeply understand high-altitude physiological adaptation, enforcing the exact "Pole Pole" pacing cadence required to guide non-mountaineers safely to Uhuru Peak.
- Strict Porter Welfare & Ethical Standards: As a highly reputable company, Jaynevy Tours ensures pristine ethical standards across Northern Tanzania by providing fair wages, robust cold-weather gear, comfortable sleeping environments, and clean, nutritious meals for the entire field crew.
- Premium Gear and High-Calorie Nutrition: They provide sturdy, windproof, and completely waterproof structural camping tents alongside customized, hot carbohydrate-dense meals engineered specifically to maintain your energy levels when your appetite drops at high altitudes.
2. The Crucial Mountain Laws of Acclimatization
The 'Pole Pole' Pace
This is not just a slogan; it is the absolute law of the mountain. When you start climbing, you may find yourself feeling full of energy and wanting to walk as fast as you do in the city. If you do this, you will deplete your body's energy early and exhaust your heart for no reason. Your guides will walk ahead of you at a snail's pace that may seem annoying at first. However, this slow, measured pace helps keep your heart rate down, controls your oxygen consumption, and prevents your muscles from filling up with tiring lactic acid. The key is to match your guide's pace from the very first day to the last.
Hydration is Life
At high altitudes, the air is very dry, and as you breathe, you lose a lot of water from your body without even realizing it. Also, the lack of oxygen makes the body work harder, so you need water to transport oxygen efficiently. It is highly recommended to drink between 4 to 5 liters of water every single day. Drinking a lot of water might make you use the restroom frequently, but it is the number one way to prevent headaches caused by dehydration and low oxygen. Bring water bottles and a hydration bladder (like a Camelbak) for your backpack.
Force Yourself to Eat
When you reach an altitude of 3,000 meters and continue higher, it is completely normal for your digestive system to slow down and for you to lose your appetite entirely. This is one of the common effects of altitude changes. However, climbing a mountain burns massive amounts of energy (you can burn up to 4,000 calories a day). If you do not eat, your body will completely run out of fuel and you will fail to move forward. Mountain chefs will prepare meals rich in carbohydrates like pasta, rice, potatoes, and hot soups. Even if you feel nauseous, force yourself to eat small amounts to give your body the necessary fuel.
Consider Altitude Medication
Acute Mountain Sickness (AMS) is not caused by exhaustion; it is caused by the body failing to get enough oxygen quickly. Diamox (Acetazolamide) tablets are a medication that helps your body breathe faster and deeper, which increases the oxygen levels in your blood and helps you adjust to high altitudes more rapidly. Talk to your doctor before your trip to get advice and a prescription for this medication. Remember, Diamox has mild side effects like frequent urination or a tingling/numb sensation in your fingers and toes—this is entirely normal.
Honest Communication with Guides
Some people, especially competitive individuals, feel embarrassed to admit they are feeling unwell on the mountain for fear of appearing weak. This is a very dangerous trap on a mountain. Your guides' job is to protect you. They have undergone specialized Wilderness First Aid training. If you start to feel a headache, dizziness, nausea, or extreme exhaustion, tell them immediately. Often, symptoms caught early can be treated with simple remedies like paracetamol, drinking water, or slowing down your pace. If you hide it, the illness can progress into a life-threatening condition (like fluid in the lungs or brain), which will force an emergency evacuation down the mountain.
Heavy rain patterns can rapidly compromise your insulation layers. Discover how to pick weather windows that maximize safety.
Read More: Seasonal Weather & Route Optimization3. Physical Conditioning & Mental Toughness Architecture
Physical Training & Conditioning
Mount Kilimanjaro does not require technical climbing skills like using ropes or ice axes, but it does require a high level of physical endurance. You will be walking for 4 to 8 hours every day for several consecutive days while carrying a daypack.
- Hiking Practice: The best way to prepare for walking on a mountain is to walk on a mountain. Find hills near you, put on your hiking boots and your backpack, and walk for several hours. This builds the muscles in your legs, knees, and back.
- Cardio and Strength Training: Workouts like jogging, cycling, and squats help strengthen your lungs and the thigh muscles that will be heavily utilized when descending the mountain (where the knees experience a lot of pressure).
Mental Toughness
Climbing Kilimanjaro is a game of 70% mental strength and 30% physical capability. Physically, you will be tired, your muscles will ache, and you will feel short of breath. There will be freezing days, you will be tired of sleeping in tents, and you will long for a hot shower and your bed at home. This is where your mental power comes into play. You must have a strong reason driving you to climb this mountain (your 'Why'). Learn to tolerate temporary discomfort, maintain a positive mindset, and keep your focus entirely on the ultimate goal: standing on Uhuru Peak.
4. Technical Clothing & Master Layering Systems
On Mount Kilimanjaro, you will pass through distinct climate zones—from humid, warm rainforests to an arctic summit with extreme freezing temperatures and strong winds where the temperature drops below zero (down to -10°C / 14°F or lower). You cannot wear a single thick jacket for the whole trip; you need a layering system:
- Base Layer (Inner Layer): Form-fitting underwear made of moisture-wicking materials (like polyester or merino wool) that do not allow sweat to sit on the skin. Avoid cotton entirely, as it stays cold when wet and can lead to hypothermia.
- Insulating Layer (Middle Layer): Fleece sweaters or a high-loft down jacket to trap your body heat and prevent it from escaping.
- Outer/Shell Layer: A windproof and waterproof jacket and trousers (such as Gore-Tex) to protect you against heavy rain and fierce mountain winds.
The final push from high camp to Uhuru Peak takes place in brutal, sub-zero temperatures. Review our master analysis of technical layers.
Read More: Summit Clothing & Layering Secrets5. Footwear Management & Tactical Packing Layouts
Proper Hiking Boots & Socks
Your feet are your only mode of transportation, so you must protect them at all costs.
- Hiking Boots: Buy proper hiking boots that offer good ankle support to prevent twists on rocky terrain. Ensure they are completely waterproof. Warning: Do not buy a brand-new boot and wear it for the first time on the mountain. Wear them frequently two months before the trip to break them in so they soften and mold to your feet; otherwise, they will give you painful blisters that will ruin your peace of mind.
- Socks: Wear specialized hiking socks made of wool. Bring several pairs (including a very thick pair for summit night) and change them daily to keep your feet dry and warm.
Pack a Good Daypack
You will not carry your large duffel bag of clothes; that will be carried by the porters who walk ahead quickly and meet you at the next camp. This means once you separate from them in the morning, you won't see your large bag until evening. Therefore, you need a small backpack (30 to 40 liters) called a daypack. In it, you will carry everything you might need along the way: 3 to 4 liters of water, a rain jacket (in case the weather changes suddenly), a camera/phone, your emergency medications, snacks, and a warm layer of clothing. Make sure this pack fits comfortably on your shoulders and does not cause back pain.
Bring Comfort Snacks
Although your tour company will provide plenty of great food, there will be times along the trail between mountains when you need a quick burst of energy without stopping to cook. Bring your favorite snacks from home (such as chocolates, energy bars, nuts, candies, or ginger drops—which also help suppress nausea). When you lose your appetite for regular food, the taste of a familiar chocolate bar can provide a massive energy boost and a welcome psychological comfort to keep you moving forward.
Avoid packing unnecessary heavy baggage across long international flights. Learn the secret to securing robust mountain equipment locally.
Read More: Sourcing & Gear Rental Estimates6. Element Protection & Navigating Midnight Summit Night
Sun and Element Protection
The higher you go, the thinner the atmospheric layer protecting the earth from the sun's rays becomes. This means ultraviolet (UV) rays are incredibly intense on the mountain, and the sun can burn your skin severely even when it feels freezing cold.
- Sunglasses: Bring high-quality sunglasses with a high protection rating (Category 3 or 4). In snowy areas, the snow reflects sunlight so intensely that it can cause temporary snow blindness.
- Sunscreen and Lip Balm: Apply high-factor sunscreen (SPF 50+) to your face and neck every morning. Also, use a lip balm with SPF to prevent your lips from cracking and bleeding due to the dry wind and cold.
Prepare for Summit Night
This is the hardest, most challenging day that requires maximum preparation. The journey to the top does not start in the morning; it begins at midnight (around 11:00 PM or 12:00 AM). You will be walking in absolute darkness using a headlamp through terrifyingly intense cold and fierce winds.
- Headlamp Batteries: Extreme cold drains battery life incredibly fast. Put brand-new batteries in your headlamp, and keep spare batteries close to your body (in inner pockets) so they don't freeze and lose charge.
- Prevent Frozen Water: Water in bottles or Camelbak hoses will freeze solid within a few hours due to the sub-zero temperatures. Place your water bottles inside insulated pouches, pack them upside down (water freezes from the top down), and avoid using a hydration bladder system on this night as the water freezes instantly inside the exposed tube.
7. Frequently Asked Questions (FAQs)
What is the overall summit success rate for beginners?
On compressed 5-day itineraries, beginner success rates sink below 50%. However, on extended 7-to-8 day routes like Lemosho or Machame, beginner success metrics comfortably exceed 85% to 90%.
Should beginners utilize Diamox (Acetazolamide) on the mountain?
Many professional mountain guides recommend Diamox, a prescription medication that stimulates ventilation to accelerate your natural acclimatization process. Consult your physician before traveling to Tanzania to discuss proper usage.
Do beginners have to carry all their heavy luggage during the trek?
No. Local porters carry the bulk of your heavy equipment (up to 15kg inside a waterproof duffle bag), along with group dining tents, heavy kitchen setups, and fresh water. Beginners only carry a lightweight daypack containing personal layers, a camera, your headlamp, and immediate hydration.
8. Verified High-Altitude Field References
Our professional beginner blueprints are constructed directly upon empirical regional guidelines and global wilderness criteria:
- Tanzania Tourist Board (TTB) – Official conservation updates, entry visa requirements, and accredited destination operator profiles.
- Tanzania Association of Tour Operators (TATO) – Safety compliance criteria, ecological metrics, and porter ethical management standards across Northern Tanzania.